NetSuite users often look for ways to display dynamic Google Sheets in their dashboards to improve real-time reporting and collaboration. With the GURUS Data Exporter Premium, you can easily embed sheets directly into NetSuite using custom portlets.
This comprehensive guide is for NetSuite clients currently using the GURUS NetSuite Data Exporter Premium Version. Here you will find in-depth instructions on how to activate and view your license as well as embed sheets into NetSuite with the Data Exporter.
For any additional questions or concerns regarding the GURUS NetSuite Data Exporter, please consult our FAQ product page or contact our Product Support Team at support@gurussolutions.com.
Request More Info on How to Embed Google Sheets in NetSuite Using GURUS Data Exporter
1. Activating and viewing your License
You can activate and manage your product license through a simple screen.
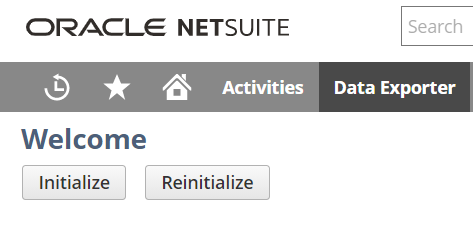
- Locate the “Data Exporter” center tab and navigate to “Data Exporter > Data Exporter Configuration > Data Exporter Licensing

- If this is your first time using GURUS NetSuite Data Exporter tool, you will be greeted by the following message:
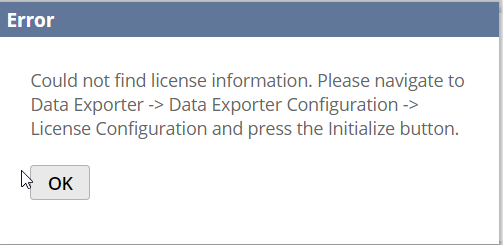
- Press the initialize button
- The page will fetch your license if you have one and display it like in the following example:
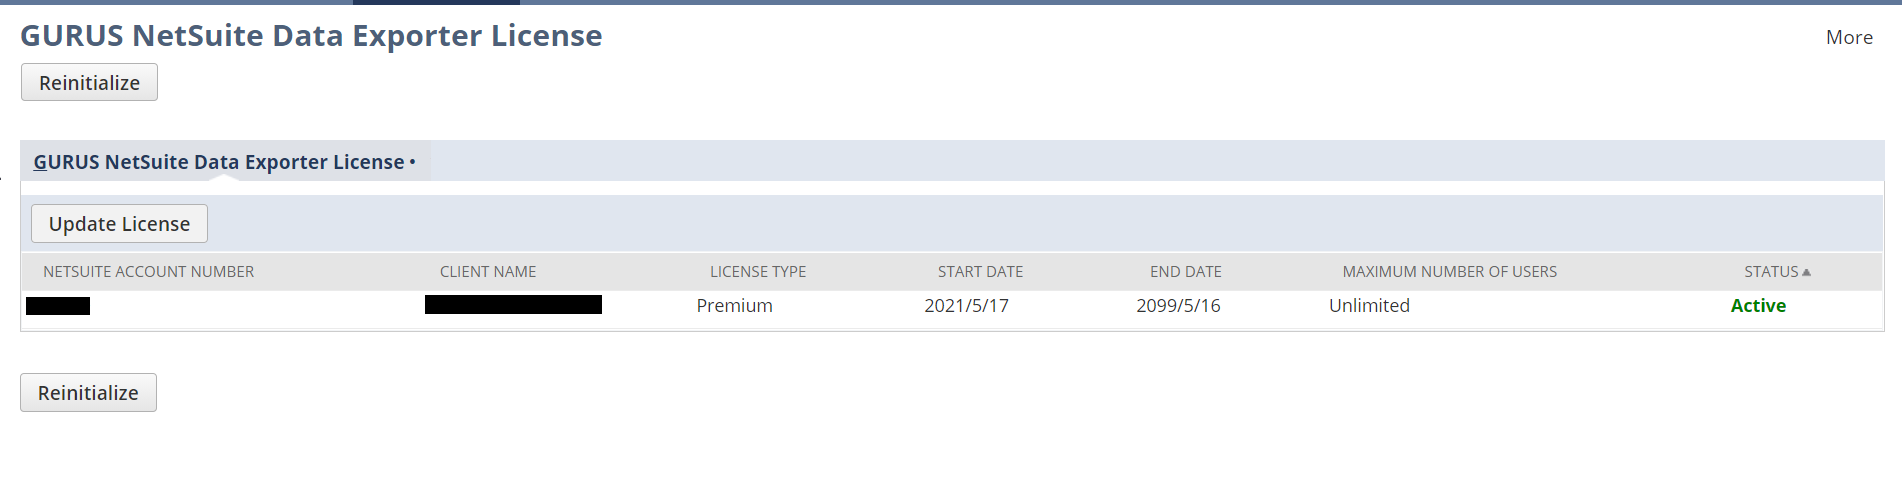
- If you need to update your license, simply press the “Update License” button.
- You can also click the Reinitialize button to force a reset of the license in case you get errors and start again at Step 1.
2. How to Embed a Google Sheet into Your NetSuite Dashboard
This section details how to add a Google Sheet into a NetSuite dashboard using the GURUS NetSuite Data Exporter custom portlet. You can add these reports into the Data Exporter dashboard or any dashboard of your liking. Refer to the NetSuite help to learn more about Portlets, Dashboards and Publishing of Dashboards.
2.1 Publish your Google Sheet for Embedding
- Refer to the Google Help on the topic: Google Docs Help
- Log into the Google Sheet where you use the GURUS NetSuite Data Exporter application.
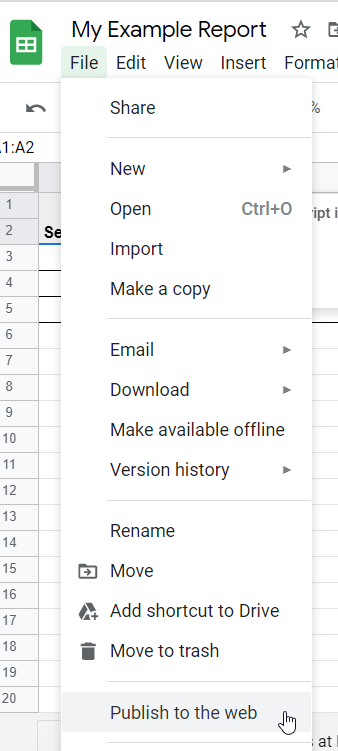
- Navigate to File -> Publish to the Web
- In the popup window, select the Embed tab.
- Select which part of the document to embed – either the whole document or a single sheet with graphics.
- Expand the Published content & Settings section and select the tab you want to publish.
- Enable “Automatically republish when changes are made” for real-time updates.
- Select your publishing audience – ideally, restrict to your own Google domain.
- IMPORTANT: Avoid unrestricted access. It is strongly recommended to restrict to users within your organization.
- Click the Publish button.
- Copy only the URL from the SRC parameter inside the embed code. For example (bolded part to be used):
<iframe src="https://docs.google.com/spreadsheets/d/e/sdgkhgjkwh6436hkjsdhg4k36hjkh-wsjkh643hv8sd-4jkesdhgjk46n4usg84w6sxudhyt389sdkhGDHErhd/pubhtml?gid=12343567&single=true&widget=true&headers=false"></iframe>
2.2 Configure the Google Sheet into NetSuite
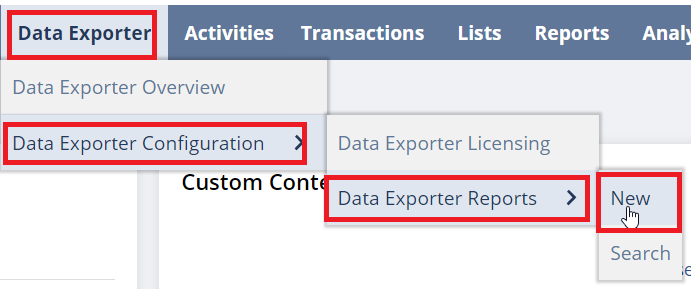
- In NetSuite, go to “Data Exporter > Data Exporter Configuration > Data Exporter Reports > New”
- Enter a report name and paste the embed URL copied in section 2.1 into the “Google Sheet Embed URL” field.
- Optionally add the original Google Sheet URL in the “Google Sheet URL” field for direct editing.
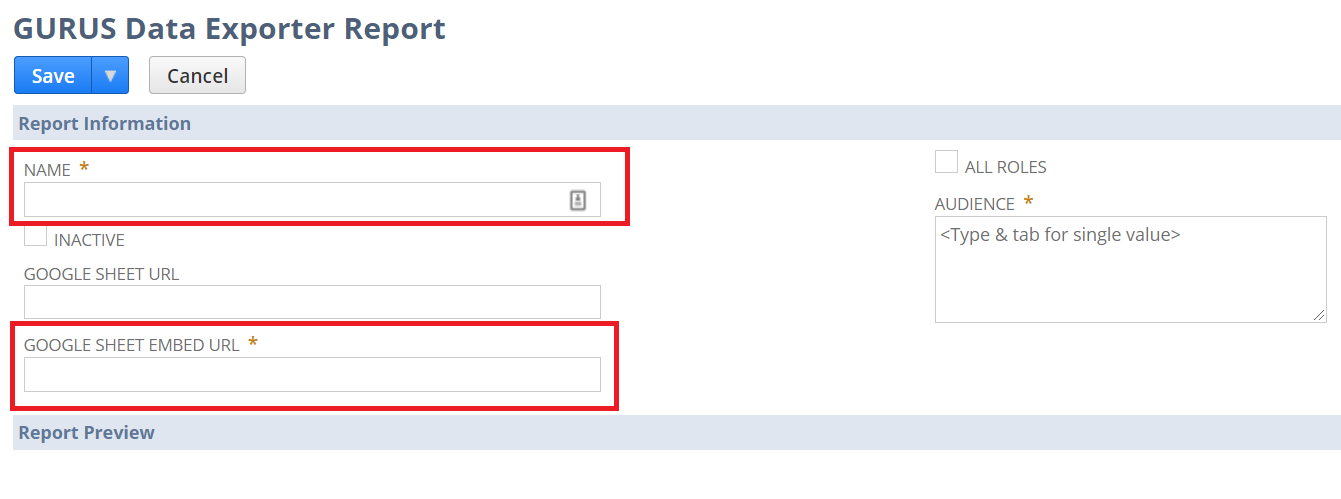
- Select the appropriate audience roles, or choose “All Roles” for broader access.
- Save the record to preview the embedded content at the bottom of the page.
2.3 Configure the Portlet
- Go to the dashboard (e.g. Home or Data Exporter Dashboard) where you want the report.
- Click “Personalize” and add a “Custom Portlet”.
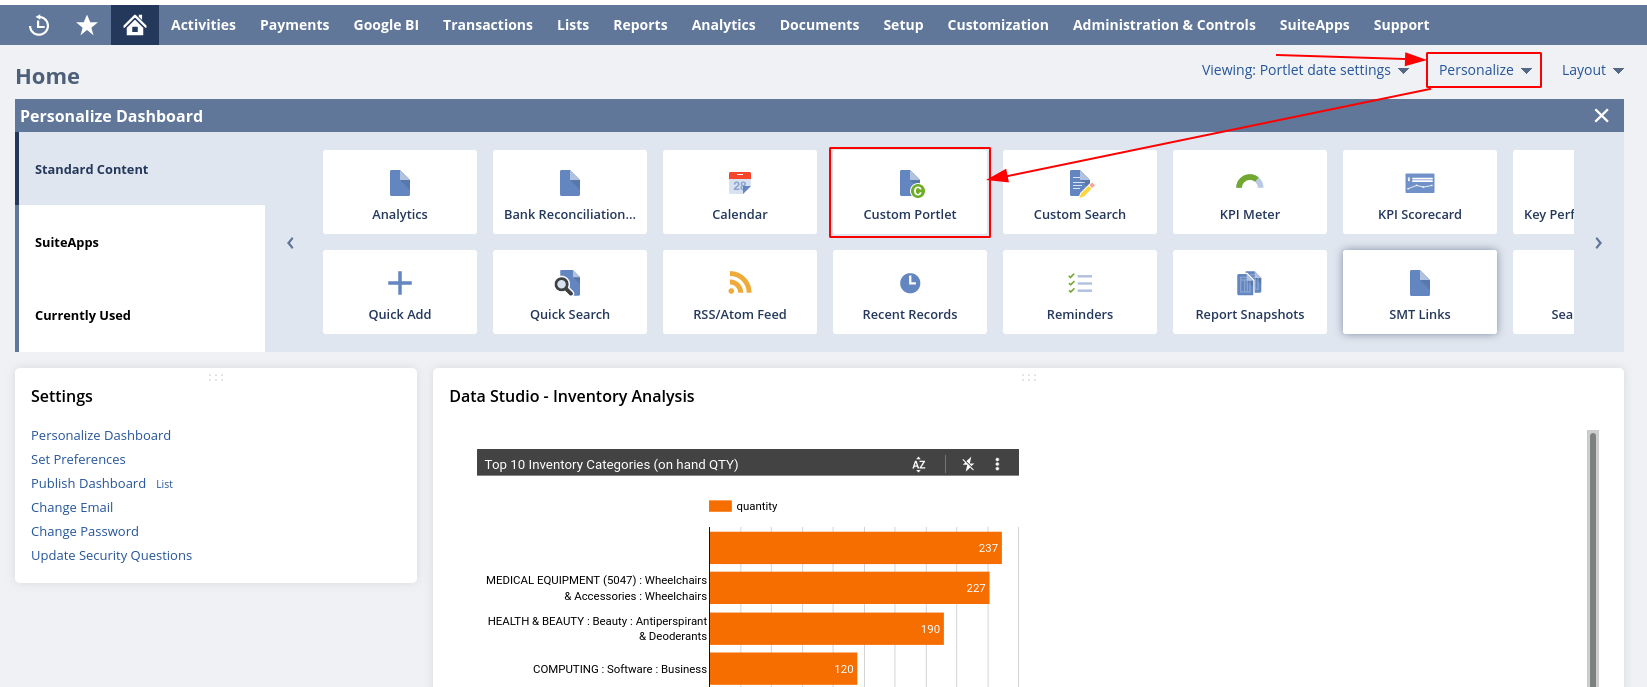
- From the 3-dot menu, choose “Set Up”.
- Select “GURUS NetSuite Data Exporter Portlet” and save.
- From the 3-dot menu again, select “Edit”.
- Set the height (start with 500 pixels) and choose your report from the dropdown.
- Click save. Your report is now embedded in the dashboard.
Optional: Refer to NetSuite Help to learn how to publish dashboards to other users.
More Questions About How to Embed Google Sheets in NetSuite Using GURUS Data Exporter